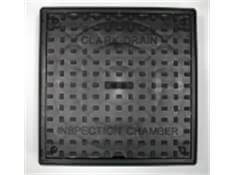
What Is An Inspection Chamber?
If you are going to install any underground drainage, either for an extension or as part of a refurbishment project, the chances are that you will need to install one or more inspection chambers. So what are they exactly, and what do they do?
What's the difference between manholes and inspection chambers?
Manholes and inspection chambers are both underground access points for drainage systems, but they cater to different needs. Inspection chambers are smaller, typically only allowing tools and cameras for visual inspection of pipe junctions. They don't enable human entry and are often used for shallower depths. Manholes, on the other hand, are larger and deeper, allowing personnel access to maintenance tasks like cleaning or repairs. They're essential for complex systems and deeper pipe networks.
Think of inspection chambers to be windows into the drainage system, providing a clear view for quick checks, whereas manholes function as service doors, allowing full access for more involved interventions.
When should you use one?
You should use an inspection chamber whenever a branch pipe joins a main drainage run (unless it's a rainwater pipe and you can rod the branch pipe downstream via a rodding eye). You should also use one whenever any drainage pipe changes direction horizontally by more than 30°, or when there is a straight run of more than 22m. The best thing to remember though when working out when to put in a chamber is that you should always be able to get a drain rod to every single part of the drainage system. Don’t skimp – you’ll be eternally grateful for your chambers in the unfortunate event of a blocked drain!
Want to learn more about the different types of inspection chambers and how to choose the right one for your needs? Dive deeper into our article here.
How Do They Go Together?
Inspection chambers are sectional, made up of three separate parts –a base, side risers and a cover. The base is a moulded section that accepts 110mm pipe into the inlets and outlet (160mm versions are also available). The risers sit on top of the base and the joint is sealed using an integral rubber seal that compresses when the riser is pushed on the base. Subsequent risers can be added to build up the height, using the same sealing method with the rubber seal. Finally the cover and frame sits on top of the last riser at ground level.
Can I Adjust The Height Of The Risers?
Yes, most manufacturers’ side risers can be cut down using a fine-toothed saw – there are usually locating ribs built in to each riser to help you make a straight cut.
So How Deep Do They Go?
There are two general sizes of inspection chamber, and whilst they vary between manufacturers the larger ones are around 450mm in diameter and the smaller ones, usually referred to as mini access chambers, are approximately 320mm in diameter. With these mini chambers you can only use them to a depth of 600mm – any deeper and you wouldn’t be able to bend a drain rod into the pipe to clear any potential blockages.
The 450mm chambers are generally used to a depth of 1.2m, but you can go down as far as 3m provided you use a restricted access cover. This is a small plastic section that reduces the chamber opening to 350mm, small enough to prevent a child from falling inside. Refer to our article for more information on how deep an inspection chamber can be installed with various chamber sizes and traditional black manholes.
How Many Inlets Are There?
All chambers have an inlet and an outlet on opposite sides. Large diameter chambers (450mm) have four side inlets, smaller mini access chambers (320mm across) have two side inlets.
All the chambers we sell have the side inlets sealed with blanking plugs - just remove the plugs from the inlets you want to use and leave the rest in place.
Is There A Choice Of Manhole Cover?

Yes, we supply lots of different covers to fit our chambers, including square, round, recessed for block paving or slabs, and airtight covers for internal use. To make things simple we supply them all as inspection chamber kits – just decide whether you need a 450mm chamber or a mini chamber and what type of cover you need, and we’ll do the rest.
Should The Chamber Be Concreted In?
Regulations say that inspection chambers should be installed on suitable bedding material. Provided the bottom of the trench is stable we would suggest that you install them on a bed of pea shingle around 150-200mm deep, and use the same material to backfill well around them.
Any Other Tips?
If you are using the chamber at a point where the drainage changes direction by 90° (perhaps at the corner of a house), use the main through channel as the inlet and outlet and fit single socket 45° bends to each end to make the 90° direction change – this maintains a smoother flow and reduces the chance of blockages at the inlet.
Don’t forget to double check that the rubber seals are in place on the base and risers, and that all unused inlets have blanking plugs in place.
For a more detailed look at inspection chambers, click on the links below which contain some short instructional clips on the products.


